How To Hang a Floating Shelf | Step-by-Step DIY Guide

How To Hang a Floating Shelf: Key Takeaways
- It’s easier than it looks. Installing floating shelves takes less than an hour when you measure carefully and hit your studs
- Studs are everything. Most walls have 16-inch spacing,; find them first for strength and long-term hold
- Bracket choice matters. Rod brackets are great for light décor, low-profile ones support deeper shelves, and flush-mount brackets give that sleek, gap-free finish
- Level like a pro. Check level on both ends and in the middle before tightening any screws.
- Match the shelf to the space. Kitchens love white oak for warmth; living rooms shine with walnut or reclaimed wood character
Nearly 60% of homeowners now use open shelving to make their kitchens and living rooms feel bigger and brighter.
This is not only because floating shelves are a design trend, but they’re also a clever, functional way to bring warmth, texture, and real storage into your home.
But here’s the best part: hanging a floating shelf looks harder than it really is. With a few basic tools, a level, and a good plan, you can install shelves that look professionally done, no contractor required.
In this guide, you’ll learn:
- Why floating shelves are worth it
- The tools you need
- Step-by-step installation
- Pro tips for a perfect fit
- Styling ideas for every room
Style your walls with real wood character.
Explore Legacy Handcraft
Why Choose Floating Shelves?
Floating shelves have become one of the most popular design upgrades for modern homes and for good reason. They deliver the perfect balance of form and function, giving you usable storage space without making your walls feel heavy or cluttered.
Reasons why homeowners love them:
- Clean and modern design: No visible hardware means a sleek, streamlined finish that complements any interior style
- Flexible for every room: From kitchens and bathrooms to offices and entryways, floating shelves fit anywhere you need both form and function
- Strong and durable: When mounted into studs, they can hold 30–50 pounds easily, sturdy enough for dishes, books, or décor
- Custom look: Available in multiple woods and finishes, floating shelves can be rustic, modern, or anywhere in between
- Easy installation: With the right tools and a bit of patience, anyone can install them in under an hour

Step-by-Step on How To Hang a Floating Shelf
Floating shelves might look like a weekend warrior project, but here’s the truth: they’re one of the easiest (and most satisfying) DIY upgrades you can do.
Let’s walk through it step by step.
Step 1: Measure and Mark Your Wall
Before you grab the drill, take a minute to plan it out. The right placement makes all the difference.
Here’s how to get it right:
- Start with a stud finder, that’s your best friend here. Studs are usually about 16 inches apart, but the distance can vary. Mark them, lightly. No need to carve your drywall
- Hold your shelf against the wall and test the height. Does it align with your furniture or countertop? Does it feel balanced? Trust your eye as much as the tape measure
- Once you’re happy, grab your level and draw a faint guideline where the shelf bottom will rest
Pro tip: Use painter’s tape instead of pencil marks. If you’re a visual thinker, you’ll get a better feel for how it looks before committing to any holes.
Step 2: Drill Holes and Add Anchors
What’s the usual move when you’re starting with this step? Slow down and double-check before you drill.
- Drill pilot holes on your marks. This keeps the screws straight and prevents splitting
- No stud? No problem. Use heavy-duty wall anchors rated for your shelf’s weight
- Wipe away any drywall dust before moving on, clean holes allow for a snugger fit
Safety tip: Drilling into tile or brick? Go slow with a masonry bit, and let the drill do the work. No pushing, no pressure.
Step 3: Mount the Bracket
Your brackets are doing the real heavy lifting, so this step deserves a little extra care.
Get a secure fit like this:
- Line up your bracket holes with your pilot holes (or anchors if you used them)
- Drive structural screws directly into studs, this is what gives your shelf its real strength
- Double-check with your level as you go. A little adjustment now saves you frustration later
Legacy tip: Legacy Handcraft’s flush-mount brackets are designed to sit perfectly tight to the wall, no awkward gaps, just a seamless “floating” look
Step 4: Secure the Shelf
Now for the fun part, putting it all together.
Lock it in confidently:
- Slide the shelf onto your bracket rods or wall plate until it feels snug
- If there are set screws underneath, tighten them gently to stop any forward movement
- Give it a quick check with the level, as you’ll know instantly if you nailed it (pun intended)
Pro tip: Place your heaviest pieces, such as books, dishes, and plants, directly above the studs to keep the balance just right.
Buy floating shelves for your wall today.
Explore Legacy Handcraft
Tools & Materials You’ll Need: Quick Checklist
Before you start drilling, it’s worth gathering everything you’ll need in one place. Nothing slows a project down like realizing your level is across the house, or your drill bit isn’t the right size.
Basic Tools Checklist
Here’s your go-to list for a smooth install:
- Power drill and drill bits: A cordless drill works best. Keep both wood and masonry bits on hand if you’re dealing with different wall types
- Stud finder: The secret weapon of every successful install. Always check for studs before you drill, they’re what make your shelf strong
- Level: Whether laser or bubble, this ensures your shelf doesn’t tilt (even a little tilt will drive you crazy later)
- Tape measure and pencil: Eyeball it, then measure twice. No shame in redrawing lines, that’s how you get it just right
- Wall anchors and screws: Use heavy-duty anchors if your studs don’t align perfectly with your shelf bracket holes
- Mounting brackets: Rod, low-profile, or flush-mount, pick the style that matches your shelf design and load capacity
Pro tip: Lay everything out on a towel or workbench before you start. That way, you won’t lose screws or bits mid-project (we’ve all been there).
Safety Gear To Keep in Mind
DIY doesn’t have to mean messy or risky, a little protection goes a long way.
Keep these handy before you start drilling:
- Safety glasses: Keep dust and debris out of your eyes, especially if you’re drilling into drywall or brick
- Dust mask: Helps when drilling into older plaster or reclaimed materials
- Work gloves: Protect your hands while handling wood and metal brackets
Quick check: Make sure your drill battery is charged, your bit fits your screws snugly, and your workspace is clear. A calm setup makes for clean, straight shelves.
Floating Shelf Ideas for Multiple Living Spaces
Now that your shelves are up and looking sharp, it’s time for the the fun part: styling them.
Think of them as an open frame for your personality, and a chance to show off a little style to create your perfect space.
Floating Shelf Ideas for Kitchens
Floating shelves are perfect for kitchen shelving ideas where cabinets once ruled the walls. They make everything feel lighter and more open.
Try this:
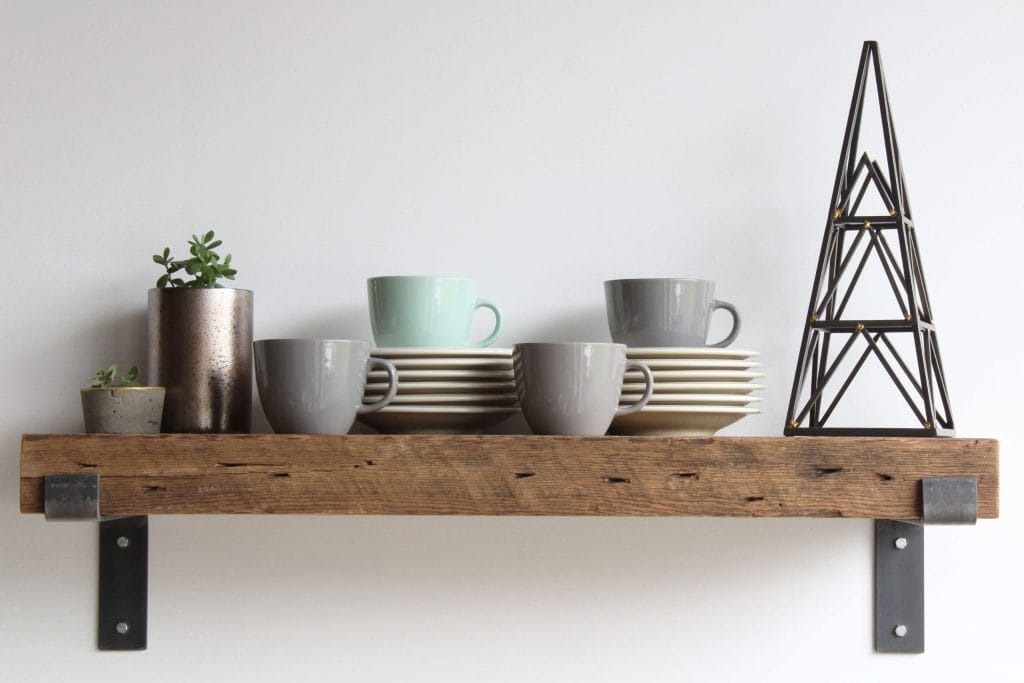
- Stack everyday dishes, mugs, or glass jars filled with pantry staples for a clean, practical look
- Mix function and style, cutting boards, small potted herbs, and ceramics keep things cozy and real
- Stick to 10–12 inches of depth for easy reach and a proportional look over counters
Legacy tip: White oak or light wormy maple shelves bring a warm, natural contrast to white cabinets and stone backsplashes.
Floating Shelf Ideas for Living Rooms
Living room shelves can do it all’ they display art, anchor your TV wall, or just give you a spot for personal touches that make a room feel lived-in.
Here’s what works:
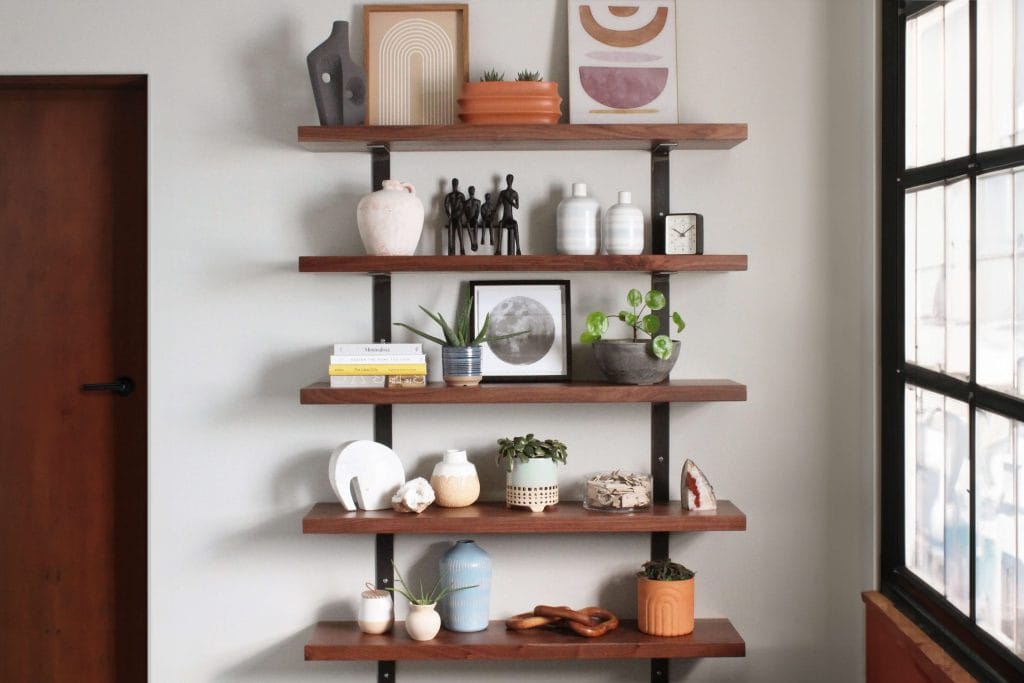
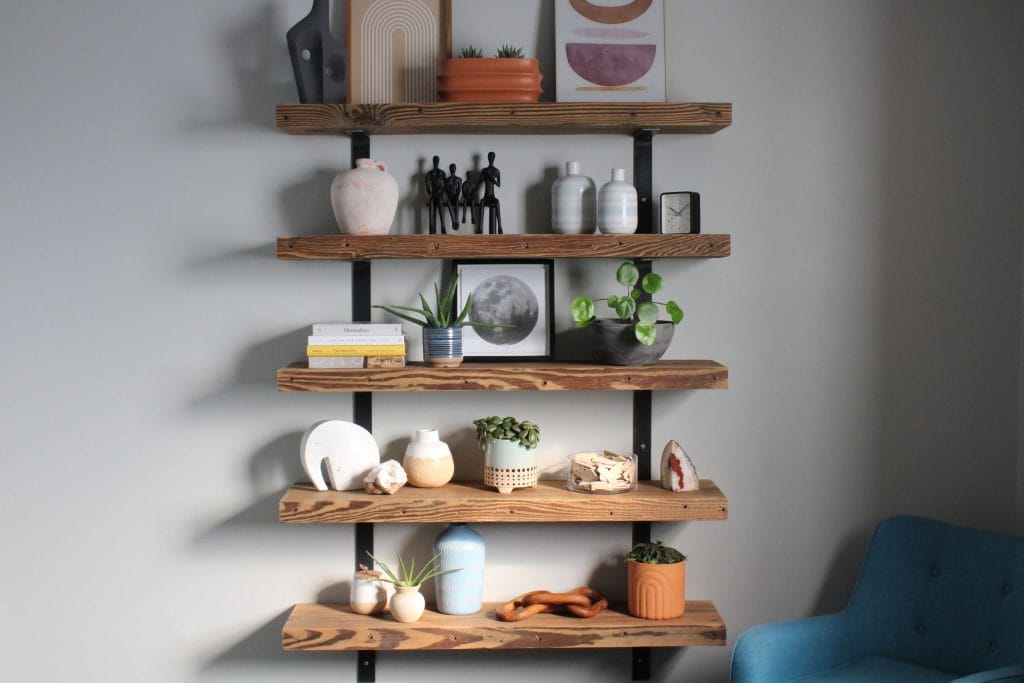
- Combine books, vases, framed photos, and greenery for a layered dimension
- Use odd-number groupings (sets of three always look balanced)
- Vary heights and textures, stack some items, leave others standing
Legacy tip: Reclaimed wood adds that cozy, worn-in feel, especially against clean white or modern metal touches
Floating Shelf Ideas for Bedrooms
Bedrooms are all about calm, comfort, and function, your shelves should reflect that.
Design it like this:
- Use slim shelves above nightstands for extra surface space without bulky furniture
- Keep color palettes soft and consistent, think books, candles, or framed art
- Pair with warm lighting like wall sconces or LED strips underneath for a cozy glow
Legacy tip: Walnut has that quiet, moody glow that makes everything around it feel intentional.
Floating Shelf Ideas for the Office
In home offices, floating shelves pull double duty:they store and style.
Try these ideas:
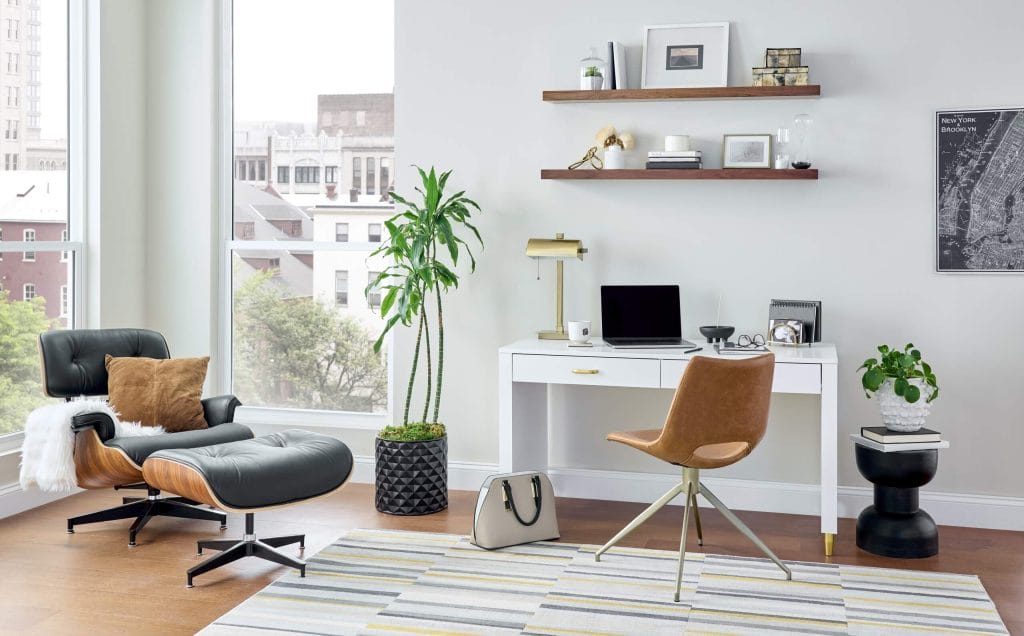
- These shelves are used for books, plants, and productivity tools you reach for
- Anchor shelves around your desk area to balance screens and workspace
- Keep it minimal, three or four items per shelf keeps your setup feeling focused
Legacy tip: Black walnut or dark-stained oak pairs beautifully with modern metal accents and clean work surfaces
Legacy Handcraft: Floating Shelves That Fit Your Space and Your Story
Floating shelves aren’t just about storage, they’re about design that lives with you. From kitchens filled with daily motion to quiet corners where you unwind, the right shelf blends strength, craftsmanship, and timeless style.
At Legacy Handcraft, we build each piece to reflect that balance: real wood, precision-fit brackets, and finishes that highlight natural beauty instead of covering it up. Every shelf is made to last, and made to belong.
With Legacy Handcraft, you can:
- Choose your perfect wood and tone: From reclaimed character to crisp white oak or rich black walnut
- Select your mounting system: Rod, low-profile, or flush-mount brackets designed for real-world use and zero-gap installs
- Customize your depth, length, and finish to fit any wall or room aesthetic
- Match across your home: With coordinated mantels, shelves, and furniture for a cohesive, handcrafted look
- Get guidance when you need it: From measuring and stud spacing to finish samples and layout planning
We believe in pieces that feel intentional, built to handle life, and made to last for years, not just seasons.
Bring real craftsmanship to your walls
Shop Handcrafted Floating Shelves
CTA: Bring real craftsmanship to your walls. Shop handcrafted floating shelves.
Floating Shelves Installation: FAQs
What tools do I need to hang a floating shelf?
You don’t need a workshop full of gear, just the basics. A power drill, stud finder, level, tape measure, and a few wall anchors are usually enough. Always check your hardware kit; most Legacy Handcraft shelves include the right brackets and mounting screws to make installation simple.
How do I make sure my floating shelf is level?
Check as you go, not just at the end. Use a long level when mounting your brackets and again when you slide the shelf on. If you’re working with multiple shelves, measure from the ceiling or countertop to keep spacing even. Trust the level, not your eye, since even small tilts show over long walls.
Do I have to find wall studs for floating shelves?
Yes. Especially for deeper shelves or heavier décor. Studs are what keep your shelf stable over time. Most walls have studs spaced 16 inches apart. A good stud finder makes this easy. If your bracket holes don’t line up perfectly with the studs, use heavy-duty anchors in between for added security.
How much weight can floating shelves hold?
That depends on the shelf depth, bracket type, and wall material. In most standard drywall installations anchored into studs, floating shelves can hold 30–50 pounds per bracket. Legacy Handcraft’s low-profile and flush-mount systems are designed for maximum strength without sacrificing that clean, seamless look.
Can I install floating shelves on tile, brick, or plaster?
Absolutely, you’ll just need the right drill bits and anchors. For tile or brick, use masonry bits and go slow to prevent cracking. For plaster, drill into studs behind the lath and use structural screws. Legacy Handcraft shelves are versatile enough for most wall types, just prep carefully.
What’s the best height to hang floating shelves?
It depends on the room. In kitchens, 15–18 inches above countertops is standard. In living rooms or offices, eye level (about 4–5 feet from the floor) usually feels balanced. For multiple shelves, leave 12–16 inches between each to give the décor some breathing room.
How do I keep floating shelves clean and looking new?
Dust regularly with a soft, dry cloth. Avoid harsh cleaners or polish, they can dull a matte finish. If you’re working with reclaimed wood, let its natural character show; small variations and wear only add to its charm.
What type of wood works best for floating shelves?
It depends on your style.
- White oak: Neutral and durable; fits modern and Scandinavian spaces
- Walnut: Deep, rich tone for statement walls and elegant spaces
- Reclaimed wood: Full of history and texture, which is perfect for rustic or farmhouse looks
- Wormy maple: Light with natural character; pairs well with clean, airy interiors
Each Legacy Handcraft piece is crafted from solid hardwoods, finished to highlight natural beauty, and built to last.
Style your walls with real wood character.
Explore Legacy Handcraft


