How Do Floating Shelves Work [Benefits + Maintenance Checklist]
![How Do Floating Shelves Work [Benefits + Maintenance Checklist]](https://legacyhandcraft.com/wp-content/uploads/how_do_floating_shelves_work_hero_image.jpg)
How Do Floating Shelves Work: Key Takeaways
- Floating shelves stay up thanks to hidden brackets mounted into wall studs
- Use at least two wall studs for strength. You’ll feel a firm stop when you hit one
- In kitchens, use shelves 10–12 inches deep. In living rooms, 10–12 inches also work best
- Use low-profile or flush-mount brackets for strong, hidden support, especially on deeper or heavier shelves
- Use a symmetry stack for a clean look, offset shelves for a dynamic layout, or wrap shelves around corners to maximize space
- White oak is light and neutral. Walnut is darker and refined. Reclaimed wood adds texture and character. Always check samples in different lighting
Kitchens, living rooms, and even entryways are trading bulky uppers for clean, open walls.
Floating shelves make that possible with real storage and a light look.
Style starts with structure. Most walls are framed 16 inches in the center. In kitchens, shelves work best at 10 to 12 inches deep. Get those right, and the rest falls into place.
Start with those two numbers and everything else gets easier.
In this guide, you’ll learn:
- What floating shelves are and how they work
- Benefits of floating shelves
- Bracket options and when to use them
- How to size for your room
- 3 layout ideas that always look good
Style your walls with real wood character.
Explore Legacy Handcraft
Floating Shelves Explained
In one sentence: A floating shelf is a wall shelf with hidden supports that mount into the wall, so the shelf appears to “float” with no visible brackets.
The Basic Anatomy
- Shelf body: Solid hardwood, reclaimed wood, or box construction with a routed channel on the back
- Hidden bracket: Rod, low-profile, or flush-mount hardware that attaches to studs
- Fasteners: Structural screws sized for the bracket and wall type
Why this matters: Hidden hardware distributes the load into wall studs, which keeps the shelf level and safe for everyday use.
Common Materials and Profiles
- Solid hardwoods: Maple, oak, walnut for strength and a premium look
- Reclaimed wood: Character marks and texture that read warm and authentic
- Thickness: Typically, 1.5 to 3 inches, depending on style and load
- Depth: 8 to 12 inches for most rooms, deeper for media or display when the bracket allows
Tip: Order finish samples first and view them in morning and evening light to see true color.
Where Floating Shelves Work Best
- Kitchen: Dish storage above counters, coffee station zones, open shelving to lighten upper cabinetry
- Living room: Media walls, art and book displays, plant styling without visual bulk
- Entry and hallway: Drop zones and small-space storage that stays streamlined
- Bath and laundry: Towels and baskets where cabinets feel heavy
Pro move: Keep 15 to 18 inches above a countertop and 12 to 16 inches between shelves for comfortable use and styling.
How Do Floating Shelves Work?
Now that you know the basic anatomy of floating shelves, common materials and where they work best, you might be asking yourself how floating shelves work.
At a glance, floating shelves look like magic, but the trick is simple: strong hidden hardware carries the weight into your wall studs while the wood hides the hardware and completes the look.
Load Path Explained
Consider the weight of the items you place on the shelf and the impact they’ll have on the bracket and studs.
Keep these points in mind:
- Vertical load moves from objects to the shelf and into the hidden bracket.
- The bracket transfers the load into studs, not drywall.
- Deeper shelves increase leverage on fasteners, so stronger brackets are needed.
Rule of thumb: A 12-inch-deep shelf needs a more robust bracket than an 8- to 10-inch shelf.
Picking the Right Bracket
Choosing the right hardware up front saves headaches later.
Use this quick guide:
- Low profile: A slim support ledge under the shelf that blends into the wall. Offers excellent support for deeper or heavier shelves, with more surface contact to distribute the load.
- Flush mount: The back of the shelf has a routed pocket that locks onto a metal plate. This creates a clean, gap-free look and adds stability by resisting forward pull over time.
Legacy Handcraft shelves and black friday shelves are built specifically for these systems. They’re easy to install, strong enough for everyday use, and designed to stay snug and level.
Tip: For books or dinnerware, skip light-duty pins. Choose low-profile or flush mount.
Studs and Spacing
Stud layout determines where your brackets can land and how much you can safely load.
Plan with these basics:
- Most homes have studs at 16 inches on center. Some are 24 inches
- Match bracket holes to your stud map or request custom spacing
- Mount into at least two studs whenever possible
Avoid: Drywall-only installs for deep or heavy shelves.
Depth, Thickness, and Capacity
When shelves are sized to fit your room and purpose, they look and perform better.
Use these targets:
- Depth: Kitchen 10 to 12 inches. Living room 10 to 12 inches for most floating shelves. For shelves deeper than 12 inches, consider wall-mounted ledgers or support brackets better suited to heavier loads
- Thickness: Slim modern look 1.5 to 2 inches. Chunky reclaimed look 2 to 3 inches
- Capacity: Follow the bracket rating. Place heavier items directly over stud locations
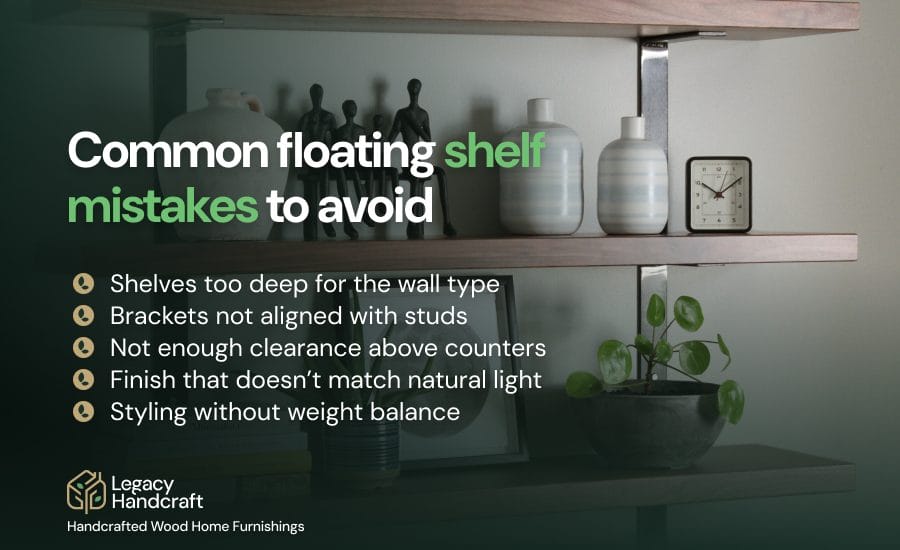
Quick check: If the shelf rocks when you press the front edge, re-seat the shelf, check set screws, and confirm bracket level.
Nonstandard Walls
Different wall types call for different anchors and techniques. Adjust your approach like this:
- Tile or masonry: Use a masonry bit and tape your drill mark to prevent slipping. Do not rush. In wet areas, seal anchor points to prevent water wicking.
- Metal studs: Use self-drilling fine-thread anchors rated for heavy loads, or span to wood blocking.
- Plaster: Check for lath and use structural screws into studs behind it.
Tip: Shim the bracket, not the shelf, to correct minor wall irregularities.
Install Sequence That Works
Following a simple order of operations will help make sure your installation is clean and level. It’s a great way to keep everything looking neat!
Follow these steps:
- Start by marking your stud locations as most homes run 16 inches on center
- Line up your bracket, double-check that it’s level, and drive in your structural screws
- Slide it on the shelf, snug it into place, and lock it down with the included fasteners
- Now you’re ready to load, but ease into it. Let the wall settle into its new job
Spec cheat: Leave 15 to 18 inches above countertops and 12 to 16 inches between shelves. Keep outlets, switches, and trim in your sightline plan.
Buy floating shelves for your wall today.
Contact us
3 Floating Shelves Layout Ideas
Ready to put your wall to work without making it feel crowded? These three layouts are easy to plan, look clean, and fit most rooms.
1. Symmetry Stack
Think classic and calm. Three shelves lined up over one another create order that works in kitchens, living rooms, and baths.
Use these quick guidelines:
- Space shelves 12 to 16 inches apart so everyday items fit and breathe
- Keep the left and right edges aligned. If your wall is long, center the stack on a focal point like a range, sink, or TV
- For heavier styling, mount into at least two studs and place denser items near stud locations
Legacy tip: Pair slim white oak or walnut with flush-mount brackets for a tight-to-wall look on flat surfaces.
2. Offset Gallery
Go for a little movement. Stagger the heights so the eye travels, which is great for artful displays and plant styling.
Plan it like this:
- Start with the middle shelf, then offset the top and bottom about one-third of the shelf length to either side
- Keep 12 to 14 inches between shelves when you plan to style with books and frames
- Balance heavy pieces low and lighter pieces high for a stable feel
Legacy tip: Reclaimed wood shines here. Use low-profile brackets painted to match the wall color so the wood remains the focus.
3. Corner Cascade
Make an unused corner earn its keep. Wrap shelves around the corner to connect two short walls.
Build it with confidence and:
- Match heights across both walls so shelves meet cleanly at the corner. Use a laser level if you have one
- Choose depths that will not crowd traffic. Aim for 8 to 10 inches in tight spaces and 10 to 12 inches where you have room
- Anchor each run into separate studs on each wall. Avoid relying on the corner itself for strength
Legacy tip: Whitewashed wormy maple keeps corners bright. Consider a thinner 1.5-to-2-inch profile for a light look.
Maintenance Checklist for Floating Shelves
Keep your shelves looking great and working hard with these quick checks.
Save this list and run through it a few times a year.
Weekly or As Needed
- Dust with a soft, dry cloth
- Spot clean with a barely damp cloth and mild soap. Wipe dry right away
- Avoid abrasives and ammonia cleaners that can dull a matte finish
Monthly Quick Check
- Look for wobble. Press the front edge lightly. If it rocks, re-seat and tighten set screws
- Scan for scratches. Use felt pads under décor and bookends
- Balance weight. Keep the heaviest items near stud locations and avoid overloading the front edge
Seasonal Tune-Up
- Tighten visible hardware. Make sure the brackets are snug against the wall.
- Check the level. Houses settle. If the wall is uneven, shim the bracket, not the shelf.
- Check the finish. Shiny spots usually mean friction. Clean the surface and let it rest.
- Review spacing and traffic. Make sure shelves don’t block doors, switches or vents after room changes.
Finish Care Tips
- Whitewash and light stains: Use water-based cleaners and matte water-based topcoats for touch-ups.
- Natural oil or hardwax: Refresh high-touch areas with a light re-oil, following product directions.
- Walnut and other dark tones: Avoid oil-based polishes, which can streak. Use a dry microfiber cloth.
- Reclaimed wood: Expect texture. Dust gently, then vacuum cracks with a brush attachment if needed.
Legacy Handcraft: Floating Shelves Crafted to Fit Real Life
Clean lines, real wood and hardware built to work as hard as you do. For shelves that look light but live strong, we craft them to stay true and hold up day after day.
Choose from:
- Slim white oak shelves for a modern, minimalist profile
- Chunky reclaimed wood shelves that bring warmth and one-of-a-kind character
- Flush-mount floating shelves for that seamless, no-gap look
- Low-profile bracket shelves for deeper runs without bulk
- Gallery wall office shelves that work in asymmetrical layouts
And many more…
With Legacy Handcraft, you can also:
- Choose solid or reclaimed hardwoods and dial in length, depth, and thickness for your wall.
- Match the right bracket to your load, from low profile to flush mount for a true tight-to-wall fit.
- Pick finishes that age gracefully, from natural and mid tones to whitewash that lets the grain show.
- Order samples so undertones align with your paint, tile, and countertops.
- Get simple install guidance and layout advice so spacing, studs, and styling all line up.
Shop Legacy Handcraft floating shelves.
Explore products
How Do Floating Shelves Work: FAQs
Still have unanswered questions after reading this? Let’s dive into common questions you still might need answers to.
What is a floating shelf?
It’s a shelf that mounts to your wall without any visible brackets, just clean lines and solid support hidden inside. Looks like magic, works like muscle.
How do floating shelves work?
Hidden brackets transfer weight into the studs, not the drywall. The shelf has a routed channel or predrilled holes that fit the bracket, which keeps the shelf tight to the wall and stable.
Do floating shelves need studs?
Absolutely, especially for anything deeper or weight-bearing. Think plates, books, or cookware. Two studs minimum keeps your shelf level and stress-free.
How much weight is too much?
Depends on your setup. A well-mounted flush bracket into studs can hold serious weight; just keep heavy items over the bracket, not dangling off the edge.
How deep should floating shelves be?
Kitchens typically use 10 to 12 inches for plates and bowls. Living rooms run 10 to 12 inches for books and décor. Deeper shelves need stronger brackets and careful stud placement.
What thickness looks best?
For a slim modern profile, choose 1.5 to 2 inches. For a chunkier reclaimed look, go 2 to 3 inches. Match thickness to the scale of nearby cabinets, trim, and countertops.
What is the ideal spacing between floating shelves?
Leave 12 to 16 inches between shelves so styling feels balanced and functional. Over counters, keep 15 to 18 inches of clearance.
What brackets are best for floating shelves?
Rod brackets suit light, shallow shelves with precise drilling. Low-profile brackets add bearing for deeper shelves. Flush-mount brackets route into the back of the shelf for a tight, no-gap fit and strong anti-slip.
Custom length. Real wood.
Buy floating shelves


